Hazel (Corylus avellana), like many shrubs, can be propagated by part burying stems whilst they are still attached to the parent plant – layering. Roots and shoots will, with luck, be produced at the point of contact with the soil and these new plants can be left in place or moved to a new location. Layering has been used by hazel coppice workers for centuries to maintain a density of plants in a wood, that produces good quality, straight poles.
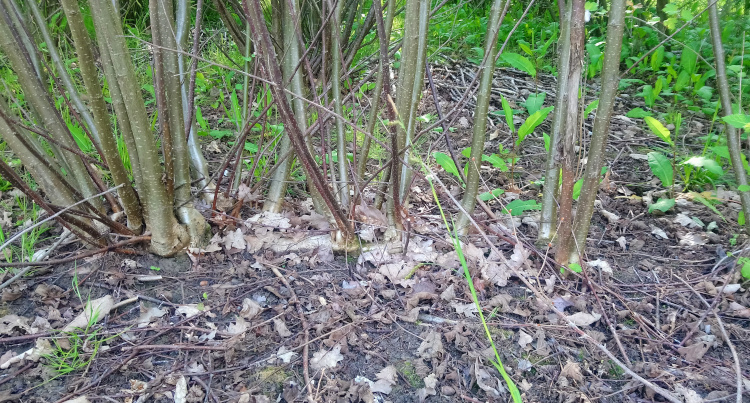
We’ve been layering in our small hazel wood since we first became aware of the practise sometime around 2003. The wood was planted in 1999, with plants evenly spaced in rows so it’s easy to see where one’s missing. This might make for an unnatural appearance compared to older woods, but it does make choosing where to layer very straightforward. The hazel was planted at two metre spacing and that’s what we try to maintain. The stools (cut or coppiced stumps) expand horizontally on each rotation of about seven years so although it’s temptng to try to increase the density, I feel that in time the plants would become too dense if much closer than two metres.
We try to do the layering as the soil begins to warm up in spring and think March/April’s probably the best time, but it’s often early May before it actually gets done. It’s certainly easier just after heavy rain when the soil’s good and wet. Whether this affects success I couldn’t say for sure. I know some people layer before cutting the hazel to make sure that the layers’ locations are optimised. My feeling is that the layers would be too much in the way and I would damage them over the course of the winter (they are quite difficult to see), whilst doing other things in the coupe, particularly extracting. Or maybe I’m just clumsy!
So this is our method, developed after watching and talking to others, and from experience over the last seventeen or so springs. I’ve tried to avoid jargon terms, but this guide is for anyone who looks after hazel coppice so I’ve taken a certain amount of knowledge for granted. The general reader might be better to skip to something else!
You will need: an axe or billhook, a mallet, a spade (I have a trenching spade with a round profile blade that works very nicely) and a collection of pegs that I’ll tell you about in a minute.
1. You’ll need to be thinking layering when you start your cutting in the autumn. As you cut the hazel through the winter and notice spaces in the wood where there should be a plant, leave a stem, ideally a young and vigorous one, uncut on the side of a stool closest to the space you want to fill. If it’s a big space, you may need to leave stems to layer on more than one stool.
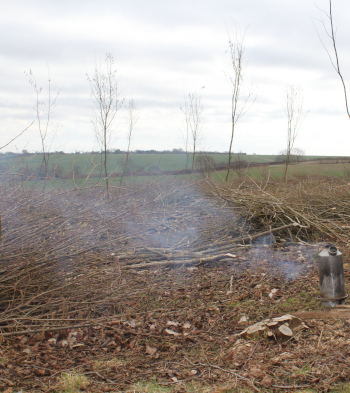
This takes a bit of forethought and care as you progress with the cutting. At the end of the season you’ll be left with a coupe that has a collection of uncut stems. Visitors are in the habit of observing “Did you forget to cut those?”
As you sort your cut hazel through the winter, collect sections of branching stems. We usually do this as we process pea sticks; a good pile develops by March. They should be perhaps 10-25mm diameter, with one straight stem of about 30cm or more long and a strong branch. Likely bits get chucked in a pile and will become pegs later.
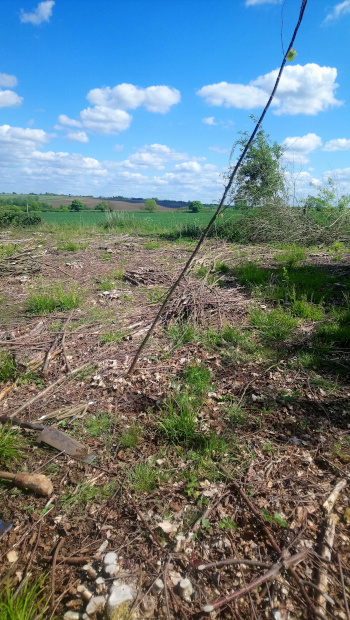
2. In spring, choose a sunny day after some heavy rain. Ok sun’s not essential but on a warm day, I always find layering a hugely enjoyable process that marks the beginning of the days of hats and sunblock.
3. Find your pile of potential pegs. Oh, you’ll need a block or horse against which to use the axe; you’ve probably got one lurking in the wood. Fashion the branched bits of hazel you collected in the winter into crude pegs – point the end of the straight section – they need to be about 20cm plus long – optimum length is probably down to your soil type – too long and they won’t go in the ground fully, too short and they won’t hold. Cut the branch to about 10cm and square off the peg’s top so it’s easier to hit with the mallet. You’ll need more than the number of layers you’re planning to do – some pegs will break and some layers may need two pegs. I do this with a side axe, but you could just as easily do it with a pair of sharp loppers – they don’t need to be pretty so put that knife away. You whittlers!
4. A bag or box for the pegs and possibly other tools is good as you’ll be moving from layer to layer and it saves running about collecting things. Pegs disappear as soon as they touch the ground and I often spend time looking for them – “Where the *@*@* are they, I just put them down a moment ago!” You know the kind of thing.
5. Take a look at the stem you are about to layer. Hopefully it will be obvious why you left it and there will be a space for it to drop into. Clear the ground along the line into which the layer will drop – no sticks or rocks – it needs to drop onto bare soil although where spaces occur in coppice, vegetation like sedges, grasses and brambles are often present. These need clearing. I do this with the spade.
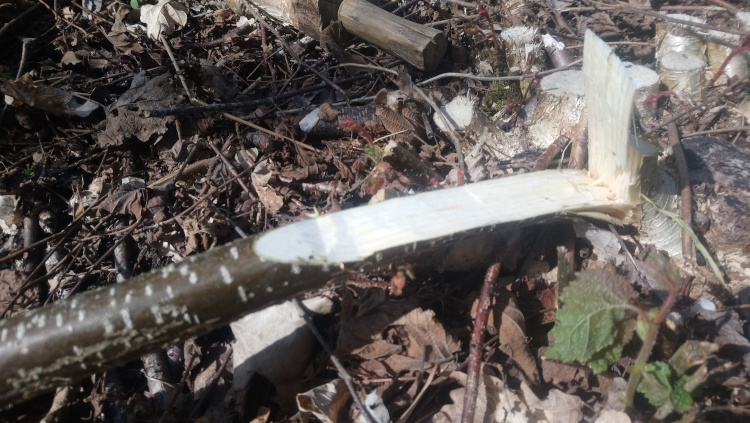
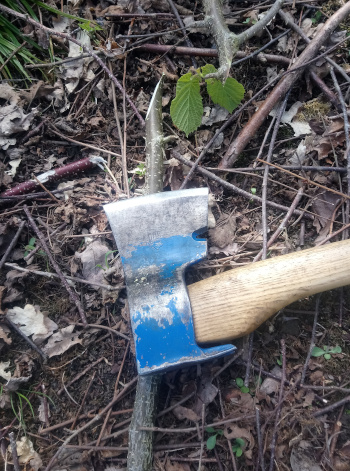
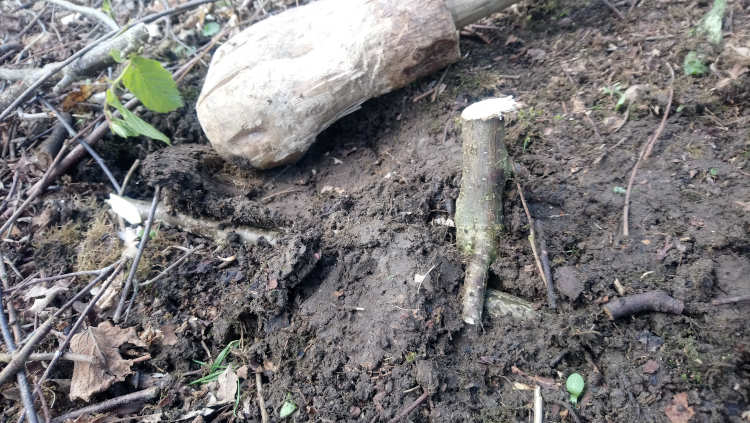
6. Take your axe or billhook and approach the stem on exactly the opposite side from the line you’ve cleared. Hedge layers amongst you will have an advantage here as the cut you’re about to make is just what you’d do to lay a stem in a hedge. Make an angled cut into that side of the stem, perhaps 20cm up it – a “pleached” cut in hedge laying parlance. Put a little pressure on the stem towards the line into which it’s going to drop and with your tool engaged in the wood, twist the blade to split the stem. No repeated hacking should be required; if your tool is sharp, it ought to be a two-stage thing – cut and twist.
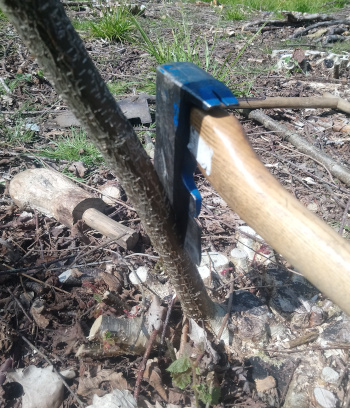
If the stem is a nice young, springy one, it should yield to this treatment without too much fuss. Older, gnarlier stems will need more persuasion. Try to leave a good bit of sound wood on the side closest to where it’s heading – maybe a quarter of the stem’s diameter.
The hedge layers amongst you will want to remove the “heel” of the layed stem – that bit that’s left sticking up after the split has been done. I like to do this just because it looks a bit dangerous having pointy bits sticking up all over. But it’s not a competition!
7. Place the layed stem in the location where you want it. If you’ve done a reasonable job on the splitting, the stem should be strong enough to allow a bit of sideways movement. This means you can shift it to exactly where you want it. Make sure the ground is clear of stuff and mark the line with the spade.
I like to lop off the top of the layer as it often helps it lie down flat.
8. Move the stem out of the way and excavate a shallow hollow along the line you’ve marked, for the stem to lie in. This is where the ground being wet really helps and where my narrow, rounded spade is great – it easily cuts a hollow about 10cm wide and only a couple deep. I’ve done this with my boot when I’ve forgotten a spade but a spade is better. And saves on new boots. I believe this hollow isn’t completely necessary but think it helps. If the soil is wet after rain, this isn’t difficult on our soil, so it seems worth doing.
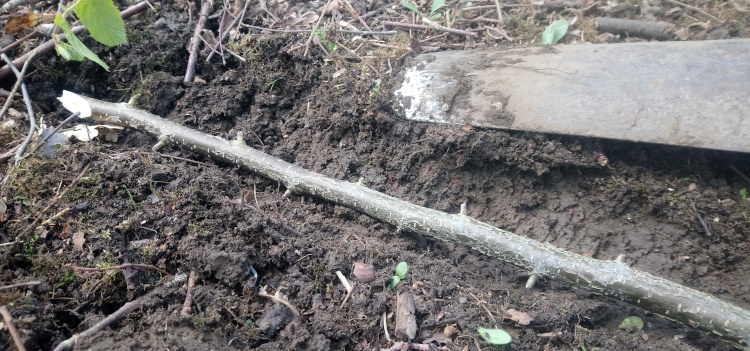
9. Lay the stem in the hollow and see how it fits. It needs to be making easy contact with soil. You may need to do a bit more cutting at the base if it’s not keen to stay down, but be cautious. I try to get as much of the stem as possible into contact with the ground – this maximises the number of new roots and shoots that will result.
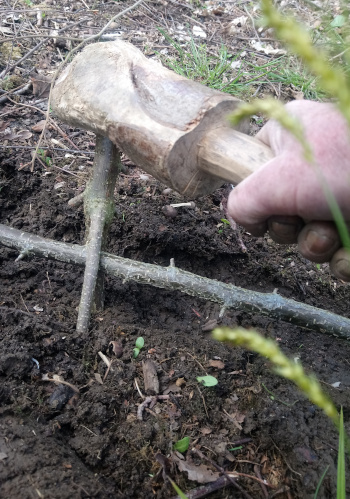
10. Take one of your pre-prepared pegs and peg down the layer so that it is firmly in contact with the soil in the hollow, banging the peg with your mallet. Add another peg further along the stem if it looks like it will help.
11. Once you’re happy the layer’s firmly in place, take the soil you removed with the spade and cover most of the layer. I am told that it’s darkness that promotes new root growth so that’s what you’re trying to achieve here.
12. If I know I still have work to do in the coup which involves moving amongst the stools, I sometimes drive stakes in the ground to mark the layers – it’s very annoying to trip over one later and destroy all your good work.
I think that’s it. All you need do now is wait. I have about 80% success – not measured at all though. Amongst dense, vigorous hazel, layers grow more slowly than the established plants. They can struggle to compete and after initial strong growth they sometimes fail after a few years – quite late in the rotation. In a plantation where we’ve been working, that hadn’t been cut for thirty years, we plan to coppice after five years to ensure as many as possible of the layers survive. That will be next winter so I don’t know yet how successful it will be.
After a couple of years, when the layers are growing vigorously, they can be severed from the parent plant, dug up and moved. Do this in winter. Establishing newly planted trees within existing coppice coupes, especially if the plant density is already quite high, is challenging, given the intense competition between plants in a newly cut hazel coupe. Coppice regrowth can reach two metres in a season whereas newly planted hazel will struggle to put on half of that. I would suggest shortening the rotation if you have done a lot of replanting.
Layering is definitely worth the time involved. It does propagate the plants that are there so if those plants are good ones, you’ll get more of them. But of course the converse is also true. Brian Williamson at Forestry England’s Westonburt Arboretum in Gloucestershire, UK, carefully selects stems to layer based on the quality of the plants. To do that you really need to know your hazel. Brian does. He makes wattle hurdles, so good cleaving properties are essential to his work and that is what he is selecting for.
I’d be very interested to hear what you think, how you do it and about any suggestions to improve the way we layer hazel.
Very interesting article thanks. I have been trying to establish hazel in a local wood where very little existed. I have been transplanting small seedlings found in places where they could not survive naturally ie. growing in paving or on paths for about 20 years now and I’m pleased to say that many have reached fruiting size and natural regeneration is taking place with naturally sown seedlings showing. I will try this method of increase in the spring.
I make shepherds crooks and walking sticks as a hobby from ram’s horn and use hazel, holly and blackthorn shanks. Coloured and mottled hazel is particularly sought after for stickmaking and perhaps this method could be used to make increase from trees with these characteristics. No one seems to know if these bark patterns are particular to specific trees or if they are the result of environmental conditions. Any ideas?
Hi Geoff, Thanks for your comment. I will be interested to hear how your layering goes, so please do let me know – perhaps at the end of next summer you should see if you have any results. I’m assuming you are in the UK.
I’m afraid I have no knowledge about colouring on hazel stems other than the variation from wood to wood and plant to plant in the brown to silver range. There is a feeling amongst hazel people that the silver stems are better for their working characteristics. I haven’t found this to be the case myself. There is some talk currently about the best ways to propagate hazel – some say cuttings are very difficult. Nut collection is tricky in the UK because of squirrels and the variation that the introduction of sexual reproduction introduces to progeny. I am interested in micro-propagation which in some areas of plant production is a well-established technique to produce very large quantities of a plant with the desired characteristics.